이번장에서는 views로 models, template를 어떻게 상호작용하는지 더 자세히 알아보겠다.
일단 우리의 mysite/main/views.py에 아래와 같이 함수를 수정하자.
def homepage(request):
    return render(request = request,
                  template_name='main/home.html',
                  context = {"tutorials":Tutorial.objects.all})
우리는 render라는걸 통해서 함수가 request와 함께 호출되면 html/template 을 만들어서 보여줄것이다. 여기서 Python object도 같이 넘겨서 rendering 할때 사용할수 있게 할것이다. 그러기 위해서 dictionary형태로 넘길것인데, key는 variable 이름이 될거고 value가 object가 될것이다.
일단 Tutorial 모델을 import 하고
from .models import Tutorial
최종 적용은 아래와 같다:
mysite/main/views.py
from django.shortcuts import render
from django.http import HttpResponse
from .models import Tutorial

# Create your views here.
def homepage(request):
    return render(request = request,
                  template_name='main/home.html',
                  context = {"tutorials":Tutorial.objects.all})
다음은 rendering 하는 template을 만들어보자.
Django는 "templates" 이름의 폴더를 각 app 폴더에서 검색할고 이름과 맞는 것으로 가져올것이다. 가끔 이름이 겹칠수도 있기 때문에 templates 폴더안에 app이름과 구조를 또 만들어주는게 좋다.
그래서 지금은 templates 안에 mysite/main/templates라고 만들고나서 거기에 main을 또 만들어줄것이다.
-> mysite/main/templates/main/.
거기에 home.html을 만들고 HTML을 여기서 코딩하면 된다.
Django는 Jinja와 비슷하게 templating을 하는데 약간 차이가 있긴하다.
일단 우리 넘겨받은 Tutorial 객체를 for 문으로 다출력해보자
Django's templating 으론 아래와 같이 할수있다.:
{% for tut in tutorials %}python과 다르게 loop가 끝날때 아래와 같이 명시해줘야 한다,
{% endfor %}
일반적으로 logic은 {% %}으로, 변수는 {{}}으로 만들어진다.
이제 위에서 만들었던 tut 객체로 작업을 해보자.
각 tut는 Tutorial객체로서 title content published date를 가지고 있다.
{% for tut in tutorials %}
    <p>{{tut.tutorial_title}}</p>
    <p>{{tut.tutorial_published}}</p>
    <p>{{tut.tutorial_content}}</p>
    <br><br>
{% endfor %}
자 이제 저장하고 홈페이지로 가보자: http://127.0.0.1:8000/
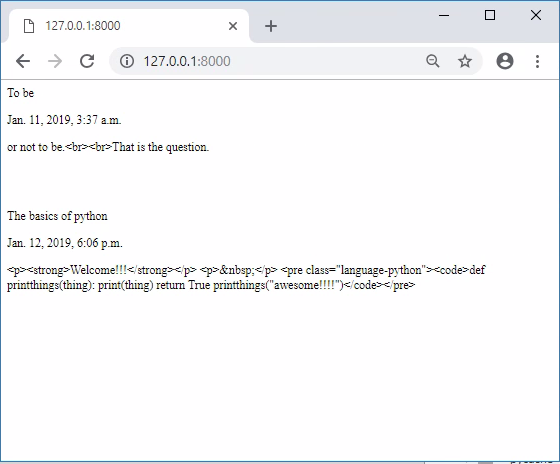
이쁘진 않지만 작동됨을 확인할수있다.
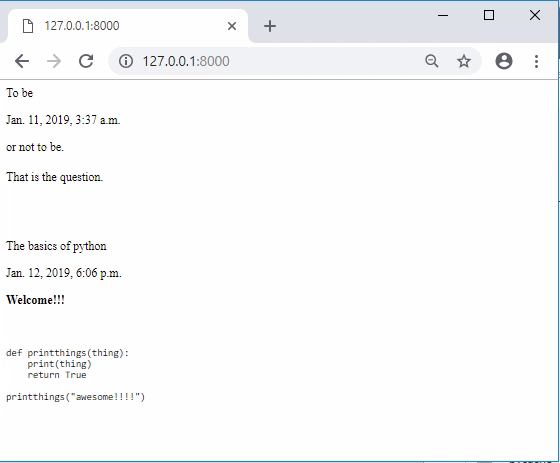
content를 보면 html를 그냥 text로 보임을 확인할수있는데 Django가 이를 보안의 이유로 javascript같은걸 작동시키지 않으려 해서인데, 우리는 이를 인지하고 그냥 templating하라고 |safe flag를 줘서 적용시킬수있다,
<p>{{tut.tutorial_content|safe}}</p>
{% for tut in tutorials %}
    <p>{{tut.tutorial_title}}</p>
    <p>{{tut.tutorial_published}}</p>
    <p>{{tut.tutorial_content|safe}}</p>
    <br><br>
{% endfor %}
이제 화면이 아래와 같이 바뀐다.
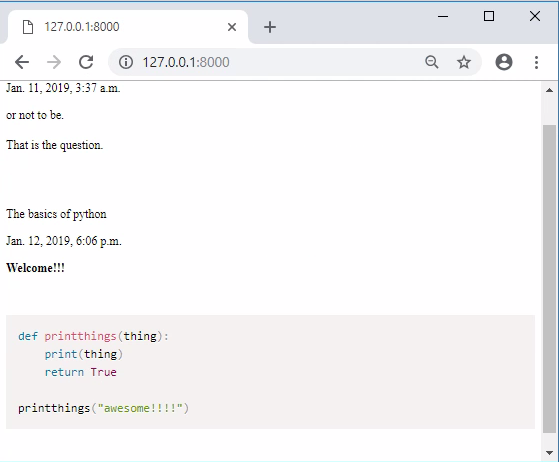
그런데 아직 highlighting같은게 적용이 안되어있다.
이를 위해서 css나 javascript가 필요한데 이를 local혹은 인터넷 어디서 떙겨와야한다.
우리는 TinyMCE에서 제공해주는 CSS랑 js를 local에서 가져와 보자
장고는 static 폴더를 다 검색할것이다. 그래서 templates처럼 폴더를 만들고 거기에 파일들을 넣어주면 된다.
: APPNAME/static/APPNAME/
mysite/main/templates/main/home.html
{% load static %}
<!-- Prism CSS -->
<link href="{% static "tinymce/css/prism.css" %}" rel="stylesheet">
</head>
<body>

{% for tut in tutorials %}
    <p>{{tut.tutorial_title}}</p>
    <p>{{tut.tutorial_published}}</p>
    <p>{{tut.tutorial_content|safe}}</p>
    <br><br>
{% endfor %}


<!-- Prism JS -->
<script src="{% static "tinymce/js/prism.js" %}"></script>
</body>
{% load static %} 을 먼저 옵션으로 주면 실제로 loading하지 않고 path 만 찾아주고
아래와 같이 사용할수있다.:
{% static "tinymce/css/prism.css" %}
이제 새로고침하면 syntax highlighting이 됨을 확인할수있다:
'Backup > Django' 카테고리의 다른 글
| [Django #6] User Registration (1) | 2019.02.04 |
|---|---|
| [Django #5] CSS (0) | 2019.02.03 |
| [Django #3] Admin and Apps (1) | 2019.02.02 |
| [Django #2] Models (0) | 2019.02.02 |
| [Django #1] Django Web Development with Python Introduction (0) | 2019.01.27 |